Golang SDK接入
更新時間:
本文介紹如何將Golang應用通過SDK快速接入SchedulerX。
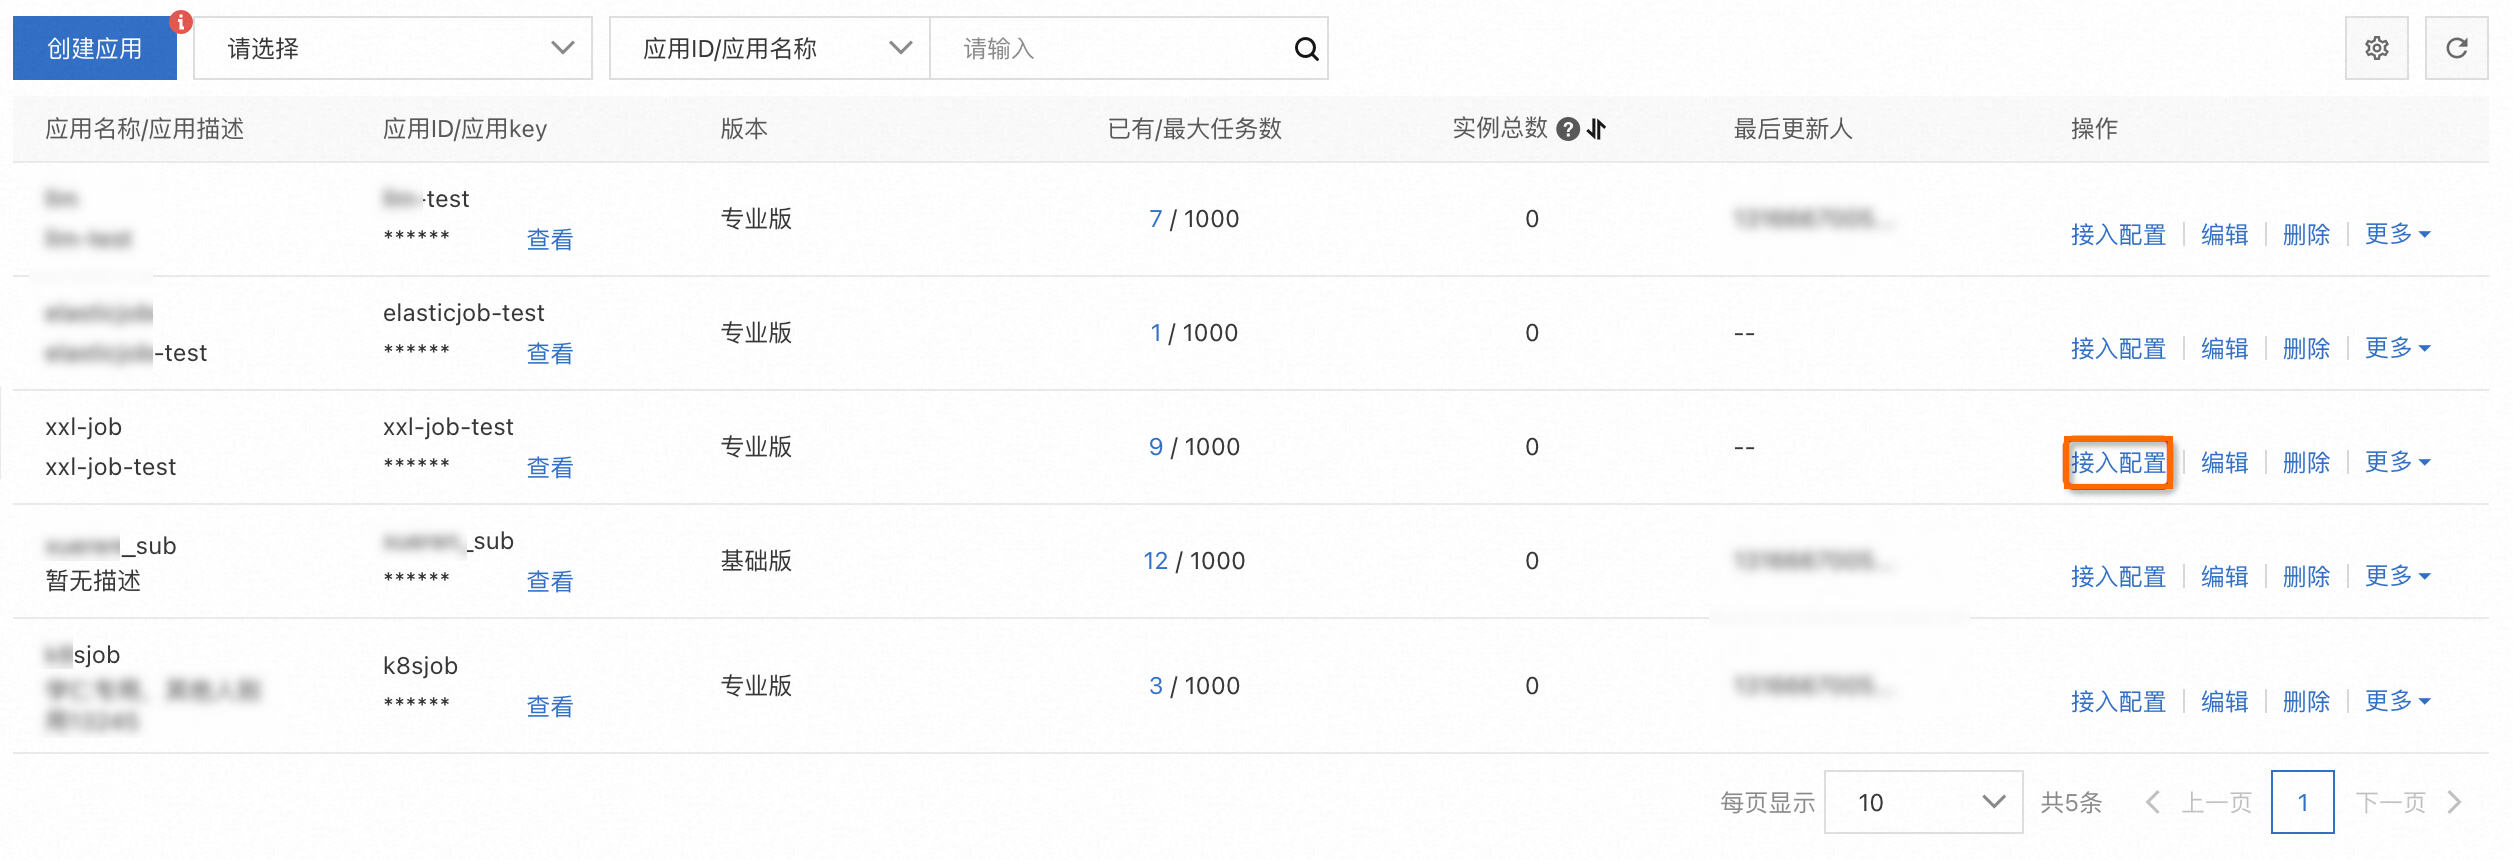
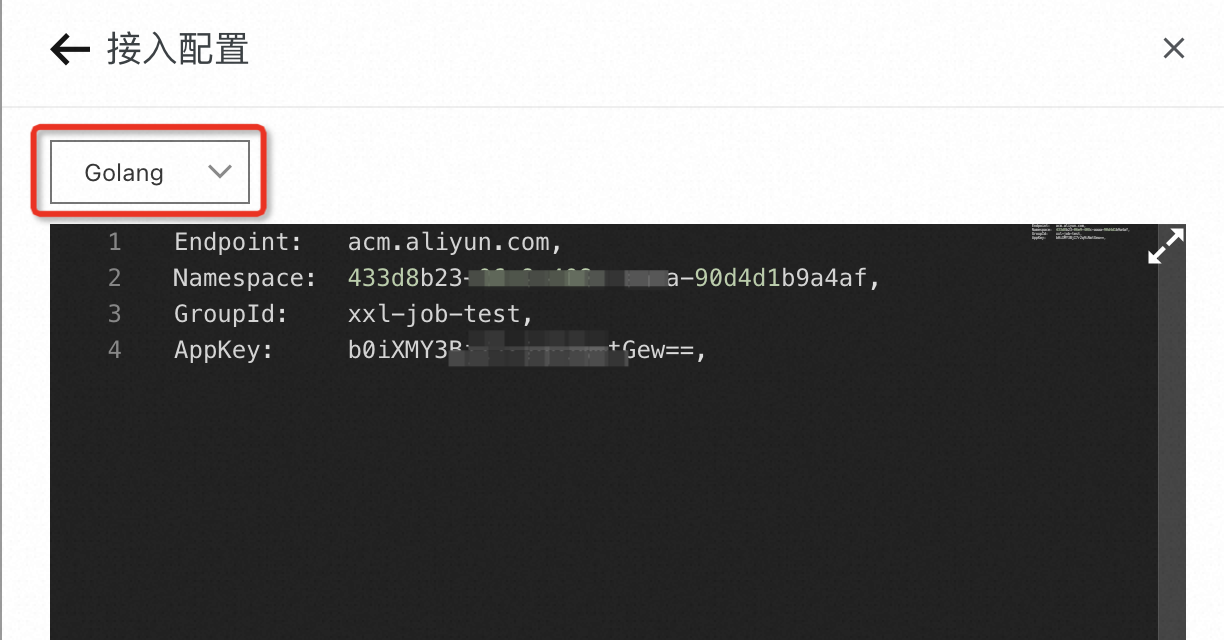
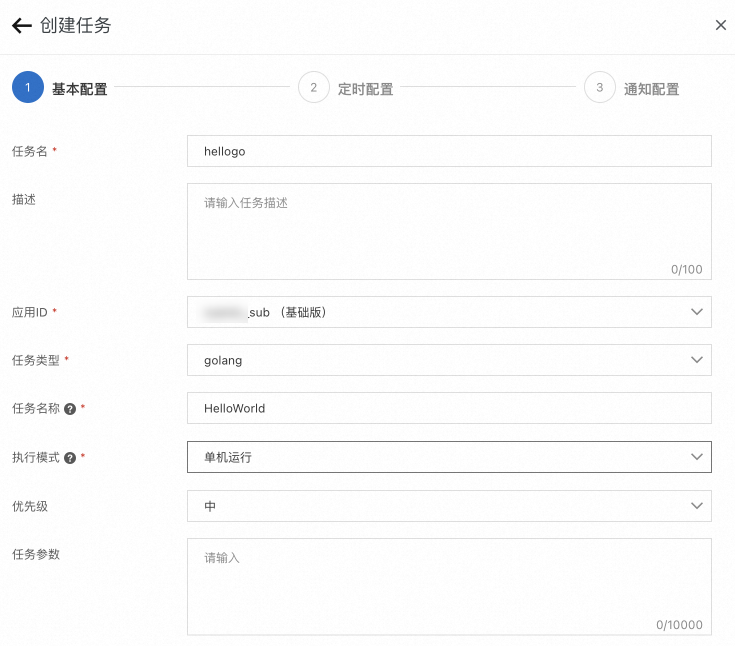
控制臺配置
客戶端接入
說明
SchedulerX提供的Golang SDK暫不適用于Windows環境。
執行以下命令,使用最新的tag拉取Go版本的SchedulerX SDK。
go get github.com/alibaba/schedulerx-worker-go@{最新的tag}或執行以下命令,拉取某個分支。
go get github.com/alibaba/schedulerx-worker-go@{分支名}編寫業務代碼,實現
Processor接口。type Processor interface { Process(ctx *processor.JobContext) (*ProcessResult, error) }示例:
package main

import (
	"fmt"
	"github.com/alibaba/schedulerx-worker-go/processor"
	"github.com/alibaba/schedulerx-worker-go/processor/jobcontext"
	"time"
)

var _ processor.Processor = &HelloWorld{}

type HelloWorld struct{}

func (h *HelloWorld) Process(ctx *jobcontext.JobContext) (*processor.ProcessResult, error) {
	fmt.Println("[Process] Start process my task: Hello world!")
	// mock execute task
	time.Sleep(3 * time.Second)
	ret := new(processor.ProcessResult)
	ret.SetStatus(processor.InstanceStatusSucceed)
	fmt.Println("[Process] End process my task: Hello world!")
	return ret, nil
}
注冊Client和Job,任務名稱與控制臺保持一致。
package main

import (
	"github.com/alibaba/schedulerx-worker-go"
)

func main() {
	// This is just an example, the real configuration needs to be obtained from the platform
	cfg := &schedulerx.Config{
		Endpoint:  "acm.aliyun.com",
		Namespace: "433d8b23-xxx-xxx-xxx-90d4d1b9a4af",
		GroupId:   "xueren_sub",
		AppKey:    "xxxxxx",
	}
	client, err := schedulerx.GetClient(cfg)
	if err != nil {
		panic(err)
	}
	task := &HelloWorld{}

	// 給你的任務取一個名字,并注冊到client中,要和控制臺保持一致
	client.RegisterTask("HelloWorld", task)
	select {}
}
Client配置參數
配置項 | 接口 | 說明 |
自定義端口 | config.WithGrpcPort | 非單機任務,worker之間需要互聯,可以指定端口,不配置的話隨機選擇空閑端口。 |
自定義網卡 | config.WithIface | 如果機器上有多個網卡,想要使用指定網卡的ip,可以自定義網卡名稱。 |
自定義標簽 | config.WithLabel | 可以給客戶端打上標簽,配置任務指定標簽調度,常用來做灰度發布及測試。 |
示例:
func main() {
    // This is just an example, the real configuration needs to be obtained from the platform
    cfg := &schedulerx.Config{
        Endpoint:  "acm.aliyun.com",
        Namespace: "fa6ed99e-xxxxxx-a2bf1659d039",
        GroupId:   "xueren_test_sub",
        AppKey:    "myV5K5Xaf1kxxxxxxxx",
    }
    client, err := schedulerx.GetClient(cfg, schedulerx.WithWorkerConfig(config.NewWorkerConfig(
        config.WithGrpcPort(8001),
        config.WithIface("eth0")))),
        config.WithLabel("test")
    if err != nil {
        panic(err)
    }

    // The name TestMapReduceJob registered here must be consistent with the configured on the platform
    task := &TestMapReduceJob{
        mapjob.NewMapReduceJobProcessor(), // FIXME how define user behavior
    }
    client.RegisterTask("TestMapReduceJob", task)
    select {}
}
結果驗證
客戶端接入完成,將該應用發布到阿里云。
- 登錄分布式任務調度平臺。
- 在頂部菜單欄選擇地域。
在左側導航欄,單擊應用管理。
在應用管理頁面查看實例總數。
如果實例總數為0,則說明應用接入失敗。請檢查、修改本地應用。
如果實例總數不為0,顯示接入的實例個數,則說明應用接入成功。在操作列單擊查看實例,即可在連接實例對話框中查看實例列表。
后續步驟
應用接入SchedulerX完成后,即可在分布式任務調度平臺創建調度任務。更多信息,請參見創建調度任務。
相關文檔
文檔內容是否對您有幫助?


