本文介紹了在 iOS 客戶端中預置螞蟻動態卡片的操作步驟。
前置條件
操作步驟
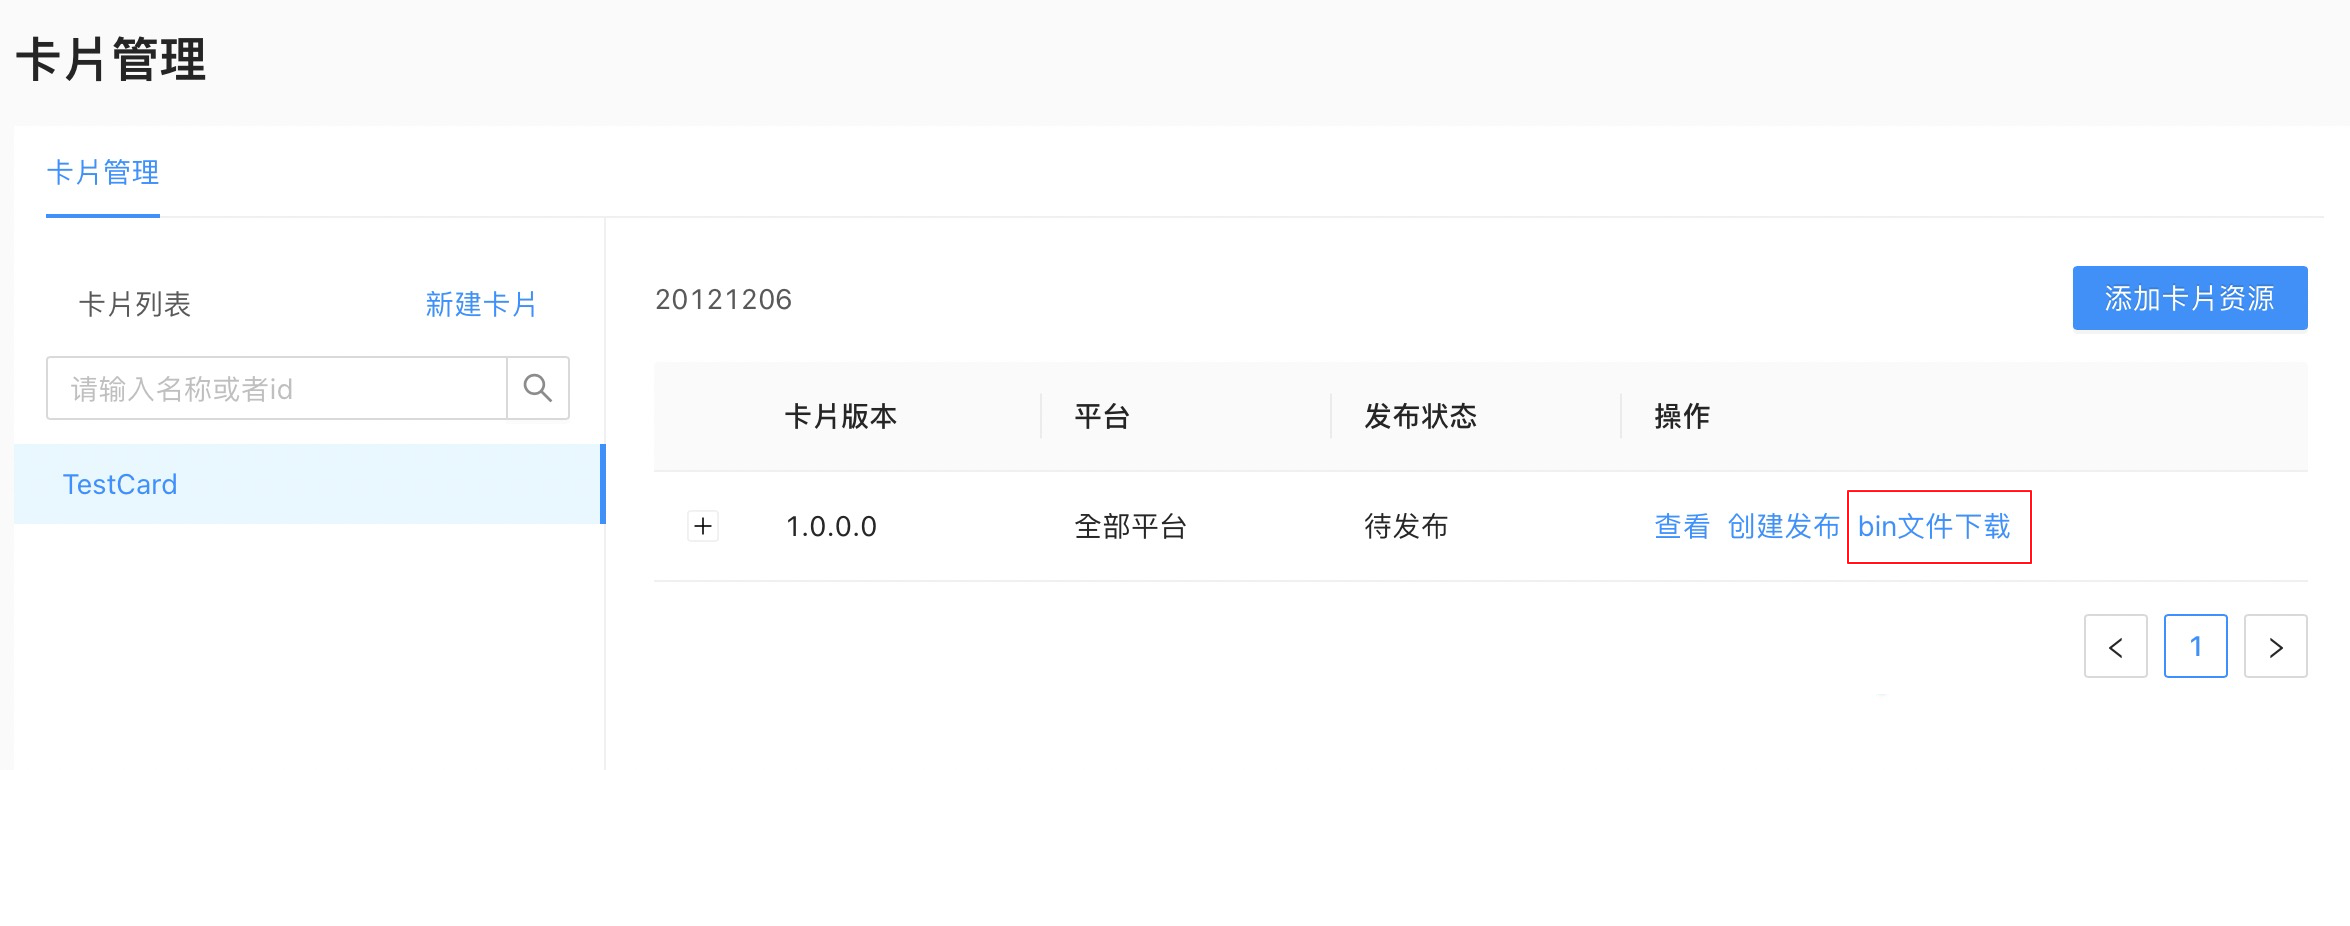
從控制臺下載 Bin 文件。

將下載的文件添加到 Bundle 中。
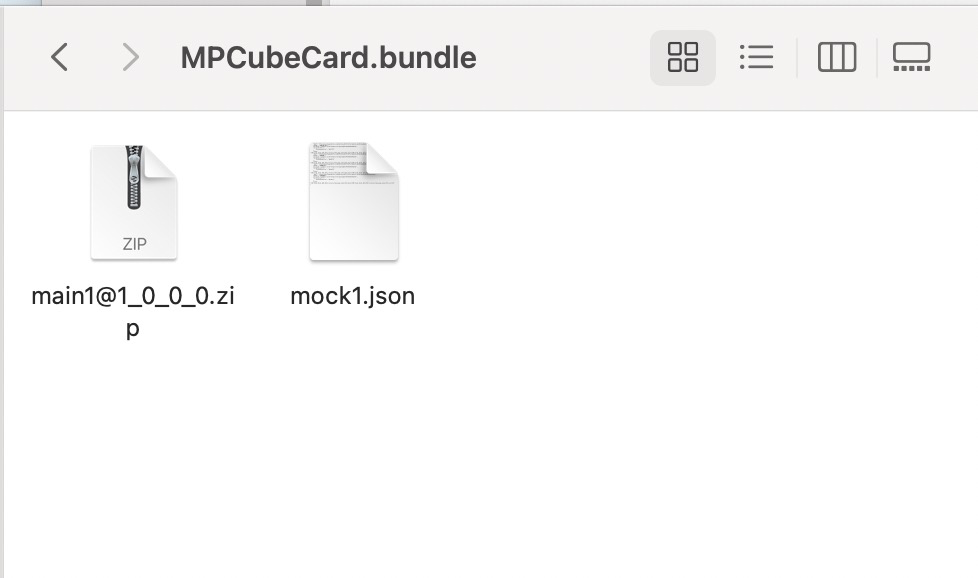
新建 Bundle 文件,將下載的 Bin 文件壓縮成 Zip 包,命名為
卡片 ID@卡片版本,例如main1@1_0_0_0.zip。此處的 JSON 文件為卡片所需要的數據,可以使用文件內置,也可以通過調用接口動態請求,根據自身需要選擇數據來源方式。 說明
說明后期控制臺將直接提供完整命名的 zip 包,無需用戶手動修改命名,只需要添加到 Bundle 中即可。
將 Bundle 引入工程中,引擎初始化時傳入 Bundle 路徑。
- (void)initEngine {
    //本地資源模板的 Bundle 路徑
    NSString *bundlePath = [NSString stringWithFormat:@"%@/%@", [[NSBundle mainBundle] resourcePath], @"MPCubeBundle.bundle"];
    CubeEngineConfig *config = [[CubeEngineConfig alloc] init];
    [config setBundlePath:bundlePath];
    [[CubeService sharedInstance] initWithConfig:config];
}
加載預置卡片。
CubeCardConfig *cardConfig = [[CubeCardConfig alloc] init];
//設置卡片版本
[cardConfig setVersion:@"1.0.0.0"];
//設置卡片 ID
[cardConfig setTemplteId:@"main1"];
//預設卡片寬度
[cardConfig setWidth:MP_Screen_Width];
//預設卡片高度
[cardConfig setHeight:CGFLOAT_MAX];

NSString *mockBundlePath = [NSString stringWithFormat:@"%@/%@", [[NSBundle mainBundle] resourcePath], @"MPCubeBundle.bundle"];
NSString *fullTplPath = [NSString stringWithFormat:@"%@/%@", mockBundlePath, @"mock1.json"];
NSString *strData = [NSString stringWithContentsOfFile:fullTplPath encoding:NSUTF8StringEncoding error:nil];
//設置卡片數據,此處為 Bundle 內置 Json 讀取數據;也可以請求自身服務端接口獲取數據,但要轉換為 Json 字符串
[cardConfig setData:[self dictionaryWithJsonString:strData]];
//創建卡片
[[CubeEngine sharedInstance] createCard:cardConfig callback:self];
文檔內容是否對您有幫助?